Showing posts with label destroyed. Show all posts

Monday, December 24, 2012

DIY Torn Cross Denim Jacket // TUTORIAL

Used to be available at NastyGal

Supplies:
- a denim jacket that you are willing to sacrifice
- an exacto knife (possibly extra blades)
- disappearing fabric ink marker
- tweezers
- sand paper (optional)
- dremel (optional)

Directions:
1. draw the shape you want to look destroyed on the back of your jacket with the fabric marker. The example above is a cross. Don't pick anything too complicated because it will get hard to recognize the more the shape is destroyed/distressed.
2. start slashing horizontally from one side of the shape to another.
3. if you do like an inch at a time, you can pull out the individual blue threads (the weft) with tweezers.
4. if you have a dremel, use the sand paper attachment to sand away the weft (blue threads) slowly not to rip the warp threads (white threads).
5. roughen up the edges with sand paper if you want a more distressed look.

Boom! You have an edgy new jacket that's uniquely yours!
Read more ...

Monday, December 5, 2011

DIY Pocket Appeal

Rather than dying or bleaching your denim, sometimes you just want something subtle.
Changing up the pockets is the way to go.


1. Find some cute fabric that you want for your pockets. The remnant pile at hobs lobs or jo-anne's is usually a good place to find some for cheap and you don't need like a whole yard or anything like that.
2. check your pocket's shape on the inside of your shorts.
3. free-hand a shape that's slightly bigger than your pocket and cut it out.
4. if the edges of the type of fabric you are using fray, cut enough off so you can hem it so there are no frayed edges, or put some of that no-fray stuff on it (available at hobs lobs, jo-annes, wal-mart, etc)
5. if you want your pocket to seem larger and stick out the bottom, cut the bottom of the pocket a little longer/bigger than your original pocket.
6. pin the pocket over the old one and sew it!
*you don't need to sew a whole new pocket since you are only trying to achieve the look of a printed pocket*
7. distress the jeans where the pockets are so the pattern can show through.
8. add studs if you desire.

enjoy :)
Read more ...

Sunday, December 4, 2011

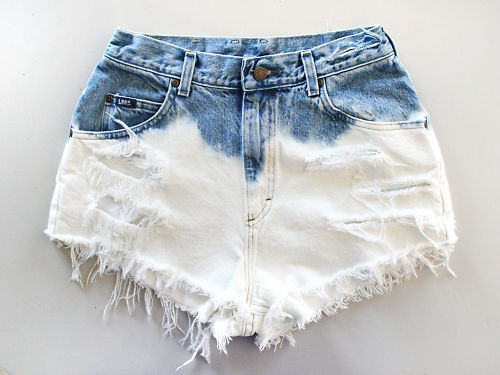
DIY Dip Dyed/Bleached High Waisted Denim Shorts

Do you have so many pairs of plain denim shorts laying around and you want to spice a pair up in a head turning way?

Mix some bleach with water. Like 1 part to 1 part. In a container that you can somehow pin or place your shorts in the same place for a while to "dip" them in the bleach so you get the desired effect below. leave them in until you get the white you wish. careful not to leave them in too long because the bleach can eat away at your denim.
to stop the bleach, wash it in some vinegar.
boom, done!
distress at your will <3
Read more ...

Tuesday, November 30, 2010

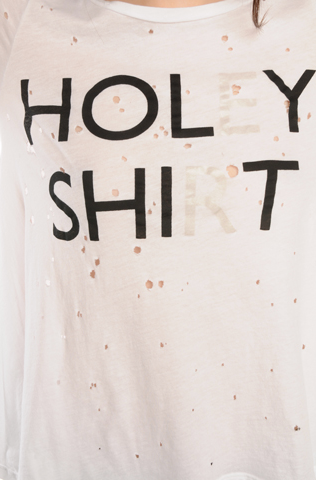
DIY HOL YSHI T Tee

I saw this on NastyGal a long time ago, but it disappeared. It is now BACK IN STOCK! YAY! But if you'd rather not pay $48 ridiculous dollars for something that only costs about 10$ tops to make, get your DIY pants on and GO!

Grab a white tee and put it on. You don't want it too tight or too loose. Grab some sharp scissors and cut tiny tiny little holes all over the tee. The reason I say put it on while doing this is you don't want the hole to end up right over your nipple or something if you're brave enough to wear it without an undershirt.
After you're done cutting the holes, take it off, lie it flat. After this there are a few options of how to do the lettering, I'll give you 2 of my ideas.
1) More expensive route: buy the iron on letters from a store in black and the E & R in white or off white if they have it. Don't get the 3D ones, get the big flat ones. Place them on & Iron away!
2) Less expensive, more time consuming: spray paint. Make a stencil for the HOLEY and SHIRT, cover up the E & R with plastic or something. Spray paint black. Let dry then cover up the other letters besides the E & R and spray paint an off white or w/e color your shirt is. So you can just barely see it.


Courtesy of: NastyGal
Read more ...

Thursday, November 4, 2010

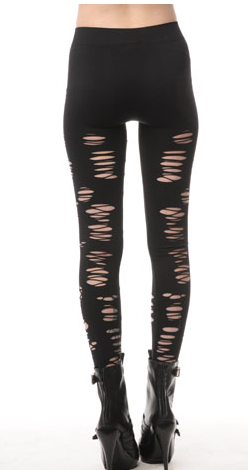
DIY Lacerated Leggings

Looking for a new way to slash those leggings that's not the same old cliche vertical way?

Here's a great idea :) I love these.

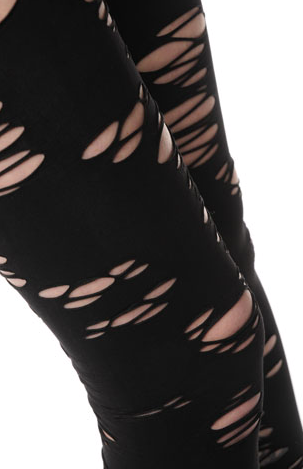
Just put them on and take a sharp pair of scissors (please don't cut yourself) and make tiny snips in random groupings. Then take them off, put them on backwards, and repeat for the back side! Just don't cut near your booty!

front

back

close up
Read more ...

Tuesday, October 26, 2010

DIY Slashed Arm 3/4 Length Shirt

Got a plain colored 3/4 length shirt lying around that just needs a little something to make it pop? Grab some scissors and snip snip snip!
You can do this 2 different ways:

1) Take the shirt and fold it in half making sure the arms and shoulders are lined up so when you cut the holes, they're in the same place on both sides and the same width.

2) Just take the shirt and lie it out flat and just cut away on the sleeves for a more uneven look.


peter som 2010

Courtesy of: knightcat
Read more ...

About Us

Total Pageviews

About Me

My photo
Follow me on twitter! @KelseyLenae