Sunday, December 25, 2011

DIY Neon on Printed Scarf

Have a bunch of printed scarves lying around that you don't know what to do with?

Brighten it up with some neon fabric paint!


Supplies:
1. neon fabric paint
2. paint brushes

Direction:
1. lay out your scarf and pin/tape it on something like newspaper in case the paint bleeds through.
2. paint on a phrase or quote or even your name on the scarf.
3. let it dry for 25 hours.
4. heat set it from the back and boom. done :)

Courtesy of JakandJil
Read more ...

Thursday, December 15, 2011

DIY Skull Cut-Out Shirt

I found this on weheartit but I'm assuming is from ImKittyRouge.


Supplies:
1. Fabric chalk
2. sharp fabric sheers
3. skull picture (google it)
4. slightly oversized tee. preferably cotton to hold the shapes of the skull better than something softer like an interlocking knit (jersey-knit).


Directions:
1. find a picture of a skull or a simple version. narrowing google images down to clip art or line art will work great.
2. draw out the skull on the back of your shirt
3. carefully cut it out with the sheers
4. find something cute to wear under it!
Read more ...

DIY Applique Leopard Print Cross Fringe Tee

There's usually enough in a print fabric remnant to make a couple of aplique shirts. Go rummage through your local fabric store's remnants and you'll be surprised what you find.


Supplies:
1. enough fabric to make a giant cross on your shirt.
2. no-sew (fabric bonding)
3. sewing machine & knowledge of basic sewing
4. matching thread
5. no fray (if the fabric you choose frays)
6. pins (if you don't use the no-sew)
7. a shirt to do this on
8. iron
9. scissors

Directions:
1. if you want an even cross, fold your fabric in half, draw, and cut out your cross shape. or w/e shape you wish.
2. iron on the no-sew bonding to the aplique
3. put the no-fray on the fabric if it frays
4. place it on the shirt where you'd like it.
5. iron it.
6. for extra hold, either do a zig-zag stitch or a straight stitch around the applique.
7. if you want the fringe look, cut the shirt as so!
Read more ...

DIY Safety Pin Choker Necklace

I stumbled across this a while ago.
Head on over to Outsapop for the rest of the post.


Supplies:
1. Safety pins
2. Pearls/beads
3. a thick strap of elastic

Directions:
1. "bead" the safety pins with the pearls or beads or both :) be creative and unique with it!
2. pin the safety pins to the elastic evenly apart.
3. pin the back 2 pieces of elastic together :)
Read more ...

Monday, December 5, 2011

Giant Upcycled Denim Tapestry

Just a quick update in my life. My final project for my textiles studio is a self portrait on cloth. I decided to take all my scraps from all the jeans i've destroyed and sew them into a giant tapestry. :D

this thing is HUGEEEEE. like...beyond MASSIVE!

but it's going to look sweet as hell.

i hope to get pictures up when it's finished!
Read more ...

DIY Printed Denim

There are a couple of ways to go about this.


- You can paint on a design using fabric paint/pigment. The best bet would be to buy commercial quality pigment (aka something you have to order).


Or...


- You can sew on a full pattern over top of your denim. For jeans this would take a decent amount of fabric, time, and perfectionism, but would totally be worth it in the end.


1. find some fabric
2. lay a piece of paper over the denim where you want your fabric and trace a pattern.
3. tape/pin it to top of fabric and cut out your pattern. leave extra if your fabric frays so you can hem it or use no-fray.
4. pin the fabric on and sew your printed fabric on your denim.
Read more ...

DIY Pocket Appeal

Rather than dying or bleaching your denim, sometimes you just want something subtle.
Changing up the pockets is the way to go.


1. Find some cute fabric that you want for your pockets. The remnant pile at hobs lobs or jo-anne's is usually a good place to find some for cheap and you don't need like a whole yard or anything like that.
2. check your pocket's shape on the inside of your shorts.
3. free-hand a shape that's slightly bigger than your pocket and cut it out.
4. if the edges of the type of fabric you are using fray, cut enough off so you can hem it so there are no frayed edges, or put some of that no-fray stuff on it (available at hobs lobs, jo-annes, wal-mart, etc)
5. if you want your pocket to seem larger and stick out the bottom, cut the bottom of the pocket a little longer/bigger than your original pocket.
6. pin the pocket over the old one and sew it!
*you don't need to sew a whole new pocket since you are only trying to achieve the look of a printed pocket*
7. distress the jeans where the pockets are so the pattern can show through.
8. add studs if you desire.

enjoy :)
Read more ...

DIY Leather Cross Tee

I buy white tees in those multi-packs all the time and I'm always looking for new ways to spice them up.

A plain white tee is like a blank painting canvas to me. Except my painting supplies are mixed media and my brushes are my hands.


1. Take a tee and cut it down into a loose tank like the one above, or just leave it as is. use your imagination and stay unique :)
2. if you don't have any extra scrap pieces of leather/pleather around from a cut up jacket or something, an alternative is black vinyl. you can buy it in huge rolls at wal-mart for fairly cheap.
3. cut out your design with an exacto-knife or scissors (sharp ones).
4. pin your cut out to your shirt and sew it on :)
Read more ...

Sunday, December 4, 2011

DIY Diamond Slashed Back Tee

When I saw this my jaw dropped. Such a good idea for a back appeal tshirt.
Every girl looks hot in a plain white tee.
Make one have back appeal and you have a new going out top.
This would be especially awesome at a black light partyyyyy :D

Read more ...

DIY Shredded T-Shirt

I've been seeing these online a lot lately and I've been doing this for at least a year now.
I'm glad it can't be mass produced :)
It's very one of a kind and awesome way to alter your tees.


A new twist to this idea, do it all the way around the bottom of a tee for a cute cut off destroyed look. i did this to a patriotic tee i had for the 4th. can't wait to wear it to the lakes this summer! :D i'll be 21 and rockin it!

Read more ...

DIY Dip Dyed/Bleached High Waisted Denim Shorts

Do you have so many pairs of plain denim shorts laying around and you want to spice a pair up in a head turning way?

Mix some bleach with water. Like 1 part to 1 part. In a container that you can somehow pin or place your shorts in the same place for a while to "dip" them in the bleach so you get the desired effect below. leave them in until you get the white you wish. careful not to leave them in too long because the bleach can eat away at your denim.
to stop the bleach, wash it in some vinegar.
boom, done!
distress at your will <3
Read more ...

DIY Studded Knit Mittens/Gloves

If you are like me, you have a shit ton of random gloves laying around. And you are bored, right?
Prepare to get un-bored! Take those gloves and turn them into cute fashion accessories with studs and some bling!

Read more ...

DIY Half & Half Studded Jacket

Although this would be difficult to pull off, it would be SO WORTH IT once completed.

I've been thinking about doing a half denim half leather jacket for sometime now and I might get it done over break if i can find a leather jacket and a denim jacket for decently cheap that are around the same fit. it should be interesting, but soooooo worth it.

i can just imagine some sweet way to do the back seam.
options?:
1. straight up and down then fill the whole line with the same sized safety pins
2. cut it zig zagged and fill with chain and safety pins


Suggested Directions:
1. Find a denim jacket and a leather jacket in the same fit/size (remember that mens and womens sizing and fits are different)
if the both zip, make sure they zip together somehow. if they don't match, you may have to rip both zippers out and just sew one on yourself.
2. decide how you want to join the two.
3. make sure you have a good sewing machine and the correct needle to sew denim and leather.
4. make sure you have a really good quality thread to sew the two together. don't want to go through all this work to just have it fall apart after you wear it out a few times.
5. buy studs in bulk. this would look bitchin with some spikes as well.
6. before conjoining, do all your bleaching before hand the denim if you wish. you can always distress it after but bleach can harm the leather/pleather after you join them if you aren't super careful.
7. be unique with it. don't copy this style exactly. add some patches or destress the leather a little bit in some places like the elbows, cuffs, and neckline.
8. rock your new one-of-a-kind denim leather jacket and turn some heads, baby!
Read more ...

Saturday, December 3, 2011

DIY Bleached Skeleton Pelvis Black Denim Shorts

I saw these and I literally died!!!

if you are skilled with a paint brush, knowledge of the human pelvis, and bleach. then you got yourself a kick ass pair of completely unique shorts.

TOTALLY MAKING THESE ASAP!!! probs over winter break in 2 weeks. :D

Read more ...

Thursday, November 17, 2011

DIY Mui Mui Sneakers

I just discovered this awesome tutorial for glitter/bling mui mui sneakers over at HonestlyWTF.

I remembered I have an old pair of white sneakers just like this in my closet. This is very much a to-do DIY over thanksgiving break! :)

Head over to Honestly WTF for the Full Tutorial!


Read more ...

Friday, November 4, 2011

DIY Mimco Sport Luxe Choker Necklace

I saw this necklace over at Refinery 29 and I almost died. Such a rockin necklace with 2 of my favorite things mixed into one: Zippers & Chain!


Head on over to House of Fraser to buy this beauty for £69.00 then £34.00 and now on sale for £27.20

or read down for a super simple DIY!

Supplies
1. medium sized chunky chain
2. 2 pairs of pliers (preferably needle nose/jewelry pliers)
3. chunky silver zipper with black cloth under it (you could get a zipper with a neon or colorful undercloth for a fun look as well!) buy a fairly long one so you don't run out.
4. sharp and thread to match the undercloth
5. E6000 glue
6. something to mark with (safety pins work great)
7. a safety hook in simliar metal color to chain (or w/e you feel comfortable using as a closure for your necklace)

Directions
1. measure your neck with the chain and mark the chain with a safety pin. you want this as a choker but not so tight. remember to count for the safety hook. you can always add or remove chain links individually.
2. where you clipped the safety pin, use your pliers to bend the link apart at the joint.
3. get your zipper and make sure it is zipped up. loop one end through one of the links and attach the end under on the wrong size of the zipper with E6000 (just a little bit for extra hold), then hand sew neatly for even more stability.
4. weave the zipper in and out of the links, careful not to twist the zipper. when you get to the end of the links, snip off the extra leaving enough to do the same thing you did with the beginning step, loop under, glue, then hand sew.
5. attach each link through each side of the safety hook.
BOOM DONE! STATEMENT CHOKER NECKLACE

if you have any questions or need clarification, just leave a comment and I'll get back to you asap!
i hope to have a real picture tutorial very soon for all of you! i've had a super busy few weeks!
Read more ...

Monday, October 31, 2011

DIY Back Appeal Shirt

Back appeal dresses and shirts have been popping up everywhere lately.
If you like a more grungy look, this shirt is for you.
Outsapop did a little post on this tee! Head over to the page to get the Full Tutorial.

Read more ...

DIY Panja Jewelry

After I saw a girl wearing an authentic Panja bracelet, I was instantly inspired. I don't have a picture of her actual hand, but I found some inspiration online.

These bracelets are also known as "slave" bracelets, but I feel like Panja is a more suited term.

I made myself a simple chain one that goes around my wrist then connects to my thumb, middle, and pinky fingers. I hope to get pictures up soon!


Here is the inspiration!


buy this bracelet here
Read more ...

Friday, October 28, 2011

DIY Safety Pin Slashed Pants

Over at Chic Intuition she showed a great quick DIY tutorial on how to spice up some plain paints.

The other day I got a rip in my leggings. they caught something sharp in the studio. it's dangerous in there sometimes! haha anyways, i just pined the rip together with a few safety pins, ta-da! instant new statement leggings :)

Check out Chic Intuition for the Full Tutorial

Read more ...

DIY Paint Splatter Shoes

I've been seeing this a lot lately; not only on shirts, but on shoes!

grab some paint and splatter away!

i think this effect would look really cool on black leather and neon paint!

remember, if you are using canvas, use fabric paint!

also, you can always spray paint your shoes to a solid color if you wish! just remember to protect the inside with painters tape or something so you don't paint the inside of the shoe! icky...


Jeffrey Campbell Paint Splatter Lita's


Read more ...

PINK LEATHER JEFFREY CAMPBELL LITA'S!

I can't believe they finally have them! NEXT ON MY LIST TO GET! they are so beautiful!

BUY THEM HERE!

Read more ...

DIY Hot Pink Studded/Embellished Denim Cut Off Jacket - LMFAO "Sexy & I Know It" Music Video

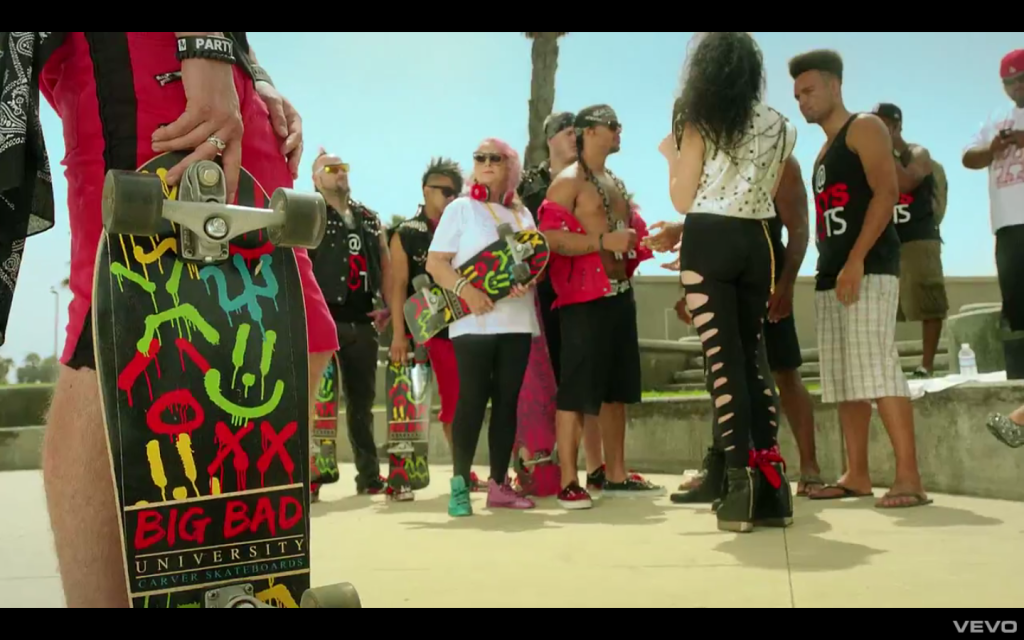
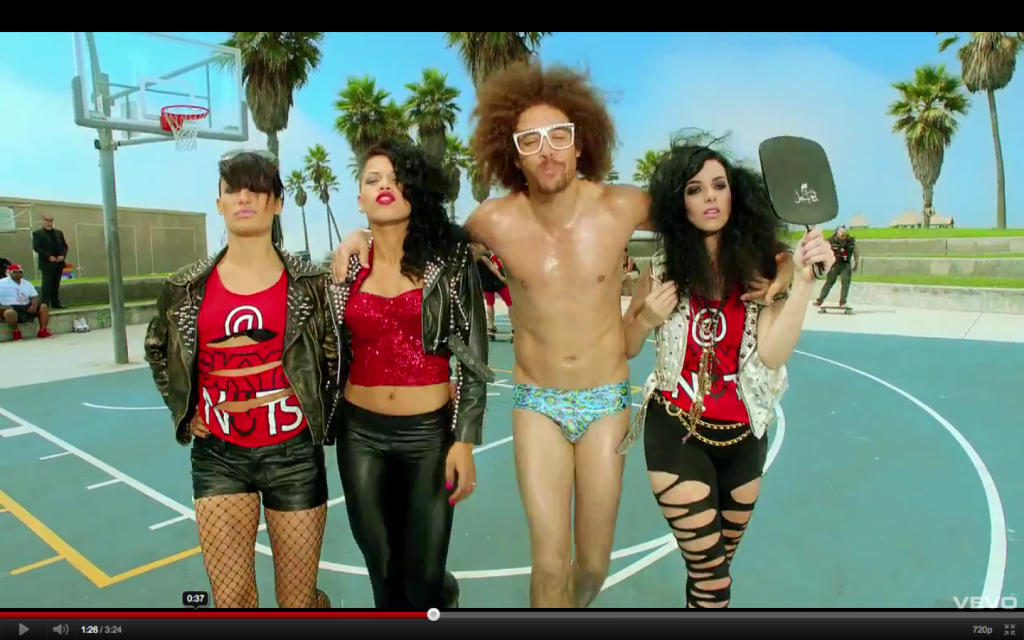
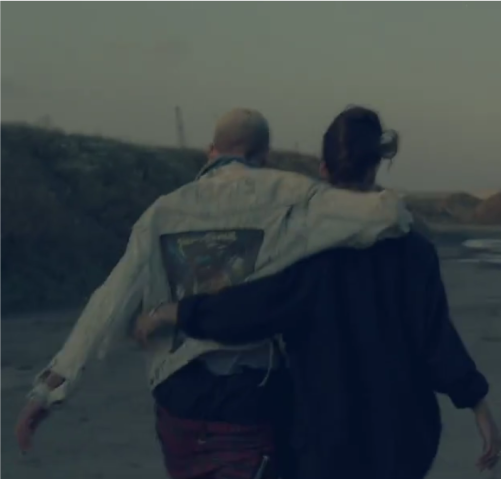
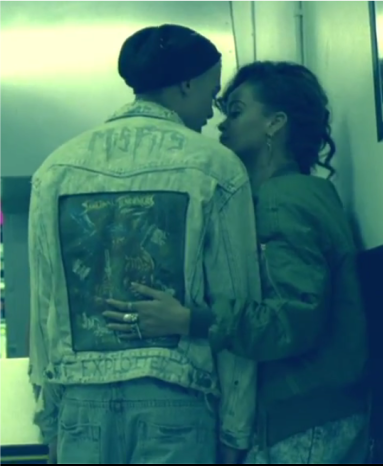
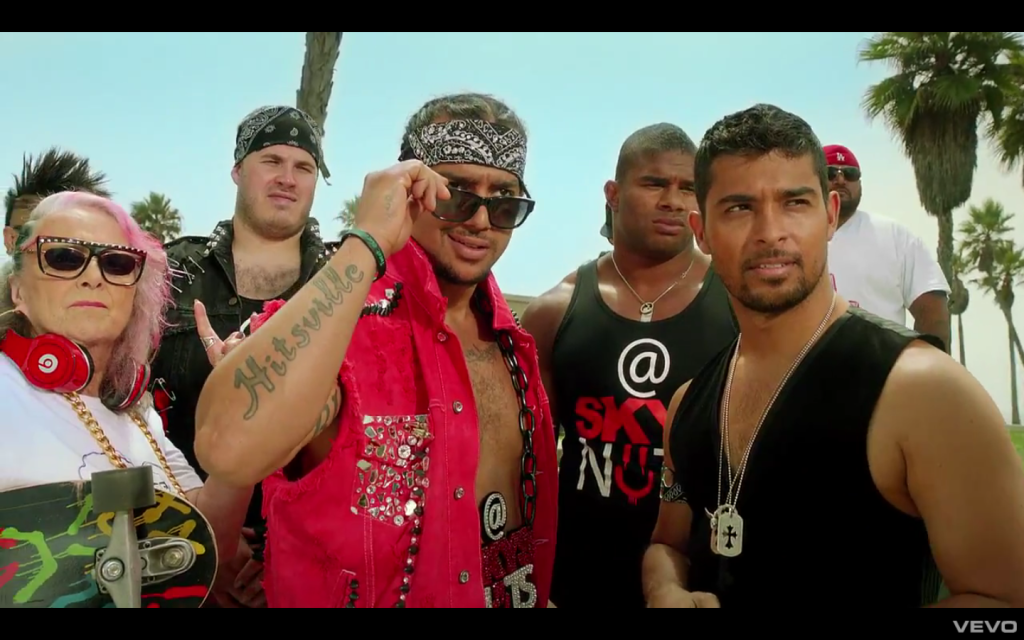
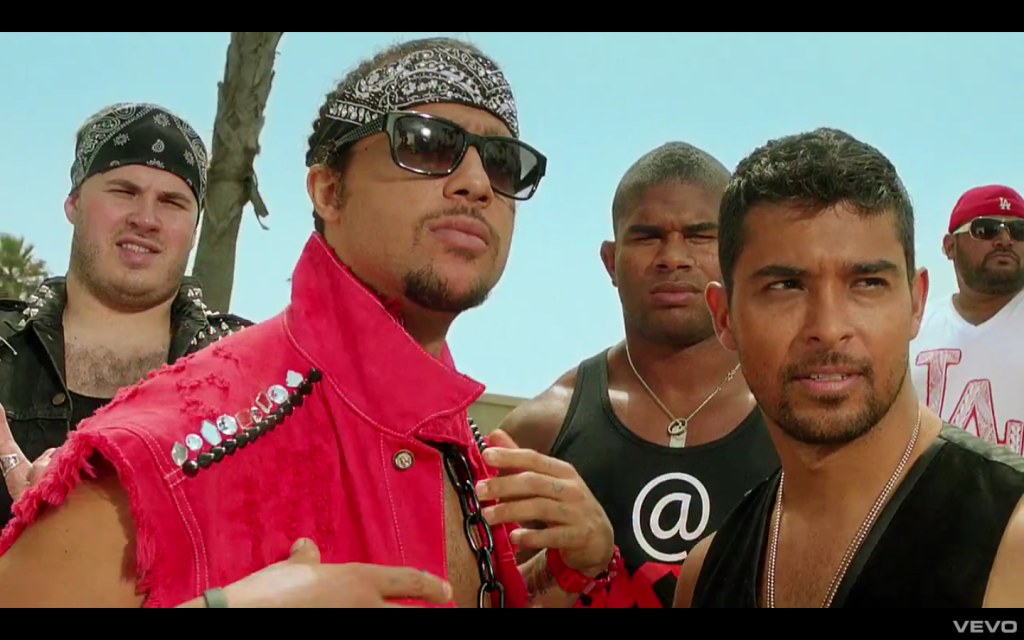
If you haven't seen this music video, I suggest you go watch now. Pretty funny.

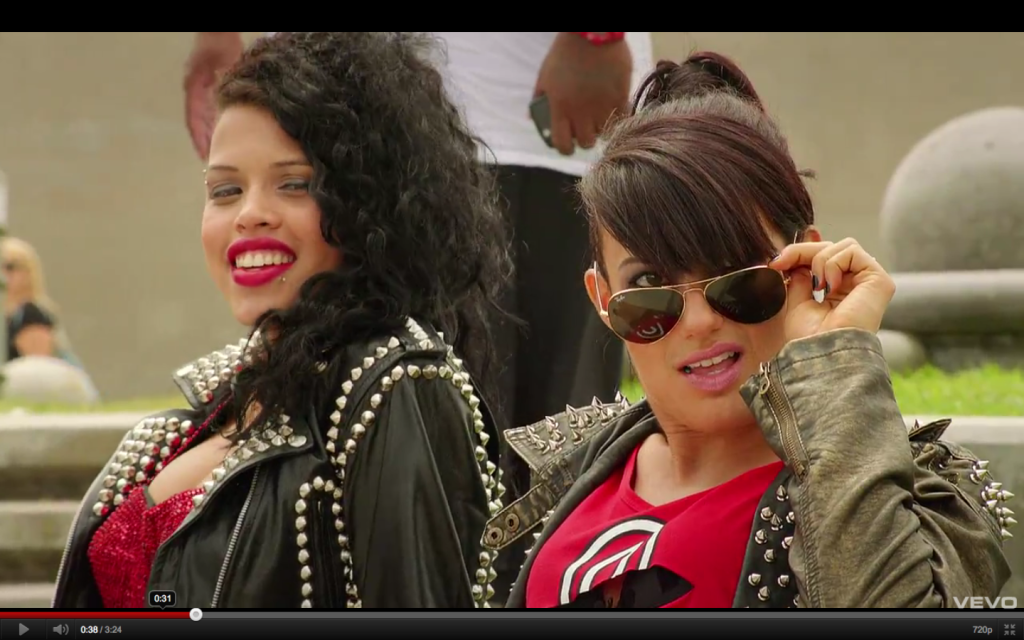
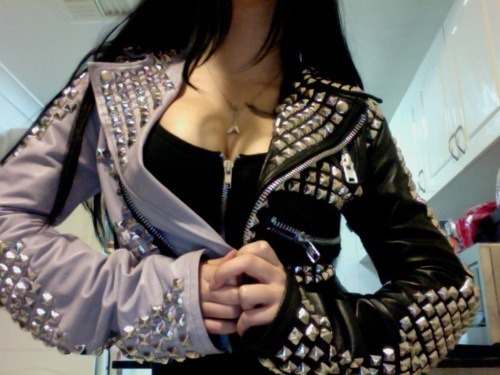
Obviously the bright pink studded/embellished jacket that one of the main guys is wearing caught my eye right away. I'm very determined to make this before the year is over :)

Supplies:
1. Denim Jacket
2. Pink Dye (or w/e color you wish. yellow would be pretty too) Rit dye will work.
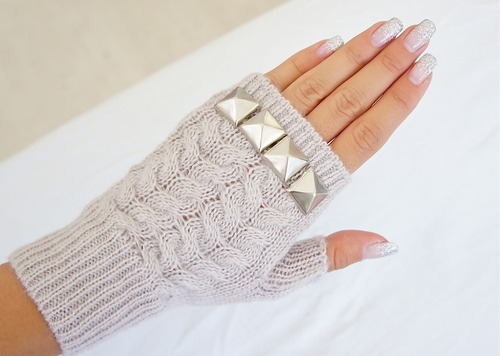
3. Studs & other embellishments. hit up hobs lobs or order in bulk online.
4. e6000 glue (if you hot glue things on, they will fall off in the cold/if you wash it)
6. needle nose pliers to save your fingers from death. they help with traditional studding.
7. needle and thread if you feel like sewing anything on. make sure you get bigger embroidery sharps. they are stronger and sharper to pierce the denim.
8. scissors
9. exacto knife

full tutorial after pictures!


Full Tutorial
CAUTION: please wear gloves.
if you want any distressing or a destroyed look to your jacket, do this BEFORE you dye it. unless you want the distressing to be white looking, then wait til after it's dyed and dried. :)

MAKE IT PINK
1. grab an old denim jacket
2. bleach it with one part bleach, 1 part water (if you don't dilute it, it will literally destroy the denim so bad it will fall apart)
3. After most of the blue denim color is out, rinse out the bleach completely either by hand or in the wash. i just wouldn't put detergent quite yet.
4. get some hot pink dye (rit dye for those of you who don't have access to the commercial grade stuff should work). you might wanna get like, 3 packs if you want it super saturated pink like this
5. find an old 13 gallon storage container in your storage room. empty it out, wash it out so it's clean
6. follow the instructions on the package for the dye concentrate to water ratio.
7. cut off the sleeves of the jacket at your discretion. (if you want to that is. I know it's fall/winter for most folks so I'll be keeping my sleeves attached when I do this DIY).
8. put the jacket in the dye. make sure you stur it with a big spoon or big piece of metal or something (most likely this will get permanently stained with dye so stir with something that you will use in the future for dying or something you can throw away). make sure it's sturdy though.
9. stur like every 2 minutes so there is no uneven dyeing taking place.
10. after you leave it in the dye for as long as the instructions allow, follow the rest of them for suggested washing after. most likely you'll rinse out the jacket until the water runs clear. I suggest a bath tub for this. it shouldn't stain it. if it does, clean it. simple.
11. hang your jacket up to dry. don't dry it in the dryer unless you want your dryer to be stained pink.

-------------

STUD/EMBELLISHMENTS
Now that your jacket is awesomely pink and dry, you can stud it!
1. gather your supplies
2. plan out what you'd like to do. where do you want your studs, and where you want your other embellishments.
3. BE CREATIVE! let your imagination run wild! do what you want and make it look good.
4. If you want just a mini statement, stud and embellish the shoulders. :)
5. tada! done! go out for a night on the town and rock your new statement jacket!
Read more ...

DIY Inspiration: LMFAO "Sexy & I Know It" Music Video

I don't know whether this video was a good or bad thing for me to come across because it's pretty ridiculous.
But there's some pretty sweet DIY fashion going on :)


Before I get to the DIY inspirations, I just wanna point out that the girl in the slashed black tights on the right is wearing fake Jeffrey Campbell Alexa Wedges.


Fringe Top
scissors meet bottom of shirt. make sure you don't cut up too high though, don't want the girls fallin out the bottom/bra peaking out.


------------

Hot Pink Studded/Bedazzled Cut Off Denim Jacket
full tutorial in next post!


Slashed Leggings/Shirt
put on leggings and shirt so you know where to slash (or more importantly where not to slash. close to butt, by boobs, etc), sissors meet fabric. don't cut yourself!


Studded Leather Jacket
order some bulk studs in w/e your favorite style is. go to town :)

Read more ...

DIY Studded Jeffrey Campbell's

I just came across these all of these amazing studded Jeffrey Campbell Shoes!!

If you for some reason are bored with your plain Jeffrey Campbell's and they are old and you are getting a new pair anyways, order some studs (screwable ones) and go to town. for the sole, use some industrial strength glue like E6000

1. Studded Jeffrey Campbell Lita's.


2. Jeffrey Campbell Lita Stud.
Read more ...

Thursday, October 27, 2011

DIY Nicki Minaj Monster Heels

Obsessed with neon and studs? I sure am!

Glitter N' Glue did a FABULOUS DIY of some crazy statement heels. Great idea!

Head over to Glitter N' Glue for the Full Tutorial!

Before

After
Read more ...

DIY Inspiration: Rihanna "We Fell In Love" Music Video

After my friend Rachel showed me this video today, I was completely hooked. So many things in her video are freaking amazing & very much have a vintage DIY feel to them. I took a couple of screen shots (sorry for bad quality, thanks a lot youtube).


Denim Jacket - def acid or bleach washed. misfits and tshirt applique on the back.


----------

Denim Vest - american flag fabric sewn on. NEED ASAP


----------

Denim Jeans - americna flag fabric sewn on the front only. awesome!


----------

Oversized Safety Pin Earrings


----------

Holey/Deconstructed Tee - funny story...already working on a shredded shoulder tee at the moment like this!


-----------------

I'll post about any DIYs I do!

ps: a girl in my textiles class is going to make the misfits denim jacket. I'm going to make the denim vest :)
Read more ...

DIY Backless Zipper Dress

I'm super in love with the dresses that have back detail at the moment. Really chic and simple in the front, then when you walk past someone they see your back and are like "woah".
I like the wow effect.

Vintage Lover did an amazing DIY of a dress and even left the zipper exposed which I simply adore. I love the chunky feel of it & the golden color.

Head on over to Vintage Lover for the Full Tutorial.

Read more ...

Wednesday, October 26, 2011

Halloween Costumes 2011

I didn't buy a costume this year :) I made them all myself! I have a whole slew of options but for sure I will be going as
"The Princess" - from the breakfast club && A Sexy High School Wrestling Official.


"The Princess" - The Breakfast Club
1. Brown Skirt
2. Brown Belt
3. Brown Riding Boots
4. Silk Blush Pink Blouse
5. Red Lipstick ;)
6. Princess Prep Attitude


----------------

Sexy High School Wrestling Official
I'm obsessed with HS Wrestling & Wrestlers [bodies hehe] jk no really. I cheered for 5 years and I miss it so much. It was seriously my favorite part of high school. So for people to specifically recognize me as a "wrestling" referee or official, I will be sporting a few key elements :) along with my knowledge of stating and I learned some new referee arm moves in case anyone decides to be a drunken idiot and quiz me that night haha.
BTW I sewed my own top. First patterned top of my life. I patterned it off a few shirts from express that I love. :)

1. Black booty shorts
2. DIY Referee top
3. Red & Green arm bands
4. Thigh High leather boots/heels. & because I know my feet will get sore, I'm borrowing my friends...
5. Wrestling shoes
6. Fishnet tights (again not regulation referee but who cares, it's sexy)
7. Whistle (boy this will be a dangerous thing for me to have all night)

----------------

I HOPE TO ADD PICTURES SOON!
Read more ...

DIY Book Clutch

Another amazing DIY from miss DirtyHems!

I've been wanting to make my best friend a Harry Potter book clutch for ages and this tutorial is super simple!
Head over to her page for the Full Tutorial.

The only thing I suggest differently is using a stronger glue like E6000 glue rather than hot glue!!

Before


After


BE SUSTAINABLE & GREEN!
RECYCLE THOSE BOOK PAGES FOR SOMETHING!!!
Read more ...

About Us

Total Pageviews

About Me

My photo
Follow me on twitter! @KelseyLenae